
Simple Nails Art- Looking for a beautiful and gorgeous way to add flair to your look? Nail art can complement your outfit for a special event or add a unique touch to your personality every day. Also, Do you fall in love with nail art every time you see it? While nail art can look intricate and complicated to do. You may be surprised how easy some designs are to create. Yes – this means you can do these designs yourself at home. These beginner nail art tutorials show you exactly how to get the nail looks you’ve been drooling over on Pinterest and Instagram. All you need is your favorite nail polish and also a few nail art essentials. you’re on your way to giving everyone else nail envy!
There are a number of designs you can create yourself. Try duo tones, glitter, and jewels, polka dots, blended colors, marbling, or stamping to create a gorgeous effect.
Step By Step Simple Nails Art Design
Orange Skittle mani

First Apply one coat of unapologetic icon to the pinkie fingernail.
Next, apply one coat of orange (bearer of rad news) to the ring and middle finger.
Apply one coat of words on the street on the index finger.
Apply one coat of yellow nail polish finger.
Repeat steps 1-4, doing a second coat of polish on each finger.
Finish with your favorite glossy topcoat, such as staying longer.
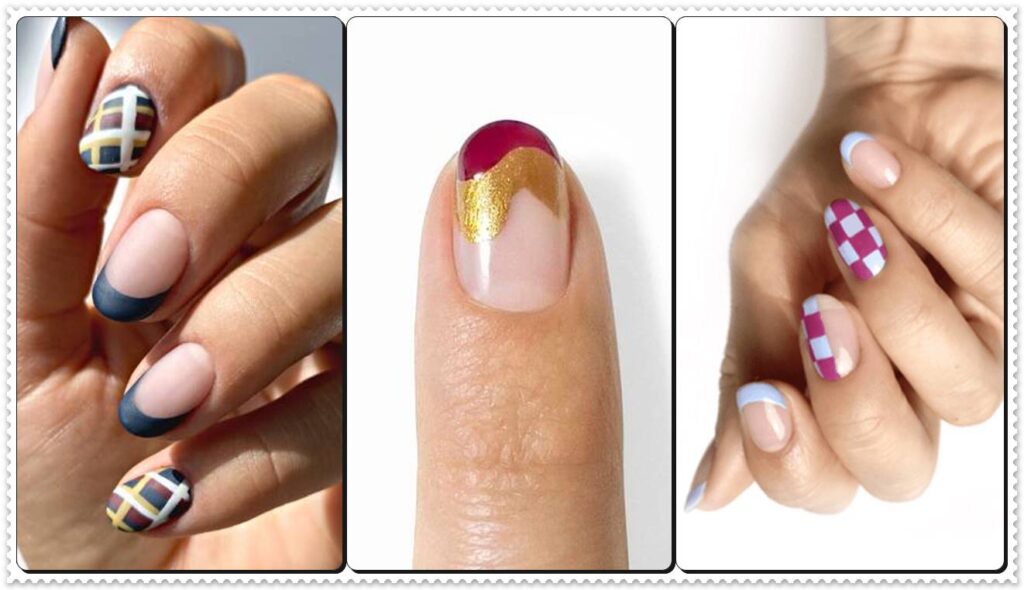
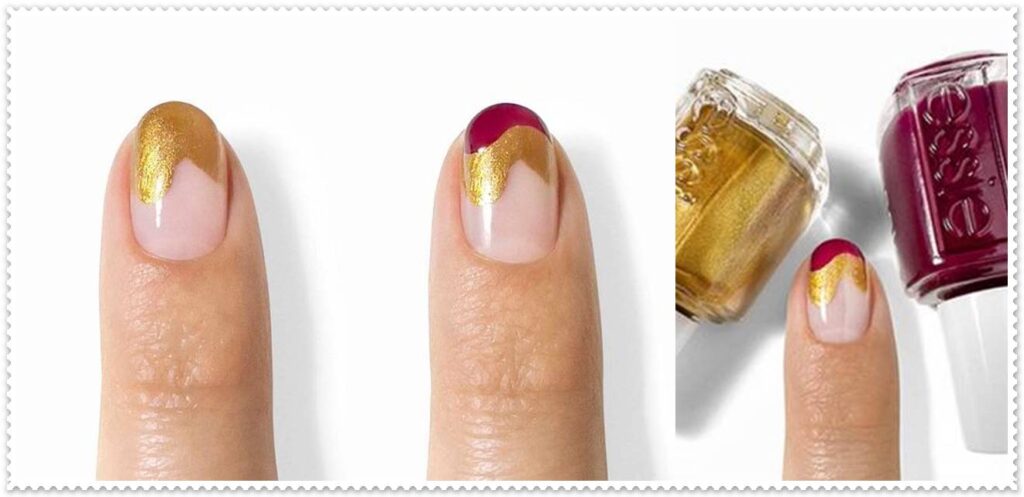
Dark academia

Apply one thin base coat to all nails.
Polish two coats of ‘ blue nail polish to the pinky and index finger. With a thin detail, brush dipped in the same shade, polish a curved french tip to the other nails.
Third with a detail brush dipped in ‘red bold’ (Essie nail the grad) polish 1-2 thick angled lines on the pinky and index nails.
The same brush dipped in white nail polish 3 angled lines in two directions on the same nails
Step five same brush dipped in ‘Essie doodle the minimum’, polish 2-3 angled lines in two directions on the same nails
step six: finish with matte topcoat’
Realistic Amethyst Nail Art
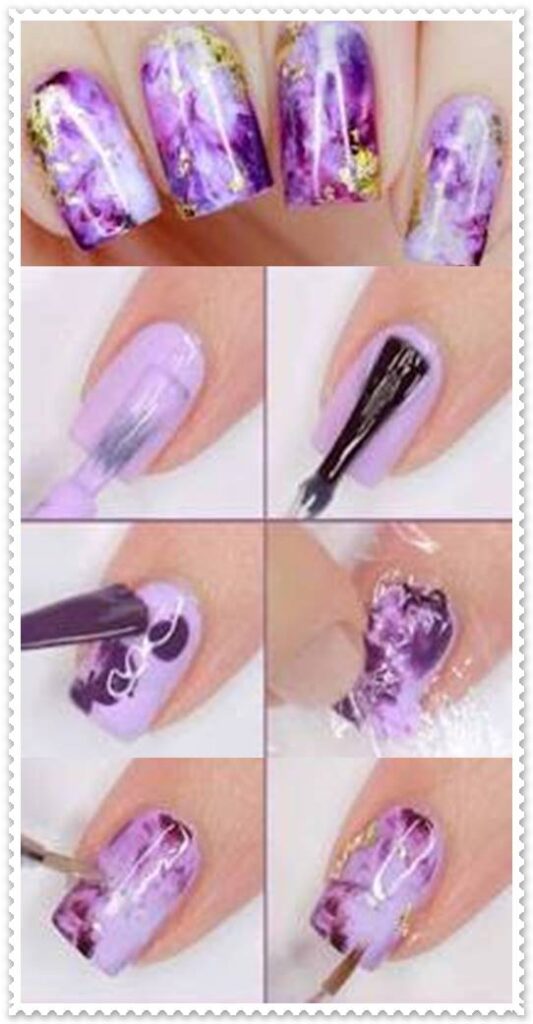
Apply a base coat.
Next, Apply 2 coats of your favorite lilac nail lacquer.
Apply a thick layer of topcoat.
Place a few drops of a deep purple shade.
Now place a cling wrap over your nail and gently dab it so that it forms a beautiful marble effect.
Using a nice shimmery gold shade and a fine-tip nail art brush add a little bit of detailing to it.
Top it off with another layer of top coat. Let that dry completely and voila.
Wave Nail Art-
Apply a thin coat of Essie here to stay the base coat.
With a not-so-silent night, polish a wavy line halfway down from the cuticle.
Repeat this step wrapped in luxury along the tip of the nail.
Finish with your Essie gel setter top coat.
- Evil Eye Nail Art Designs & Ideas Images
- Green Nail Ideas and Designs to Wear All Year Long
- Four Leaf Clover Nail Art Design Ideas – Shamrock Nails Design Pictures
- Coffin Easter Nail art Designs & Ideas Pictures 2023
Terrazzo print

Apply a thin coat of your favorite Essie base coat.
Apply two coats of hiking it up to each nail.
Top with a layer of gel couture matte topcoat
With a fine detail brush, polish irregular, angular shapes of varying size to each nail using transcend the trend, bold and boulder and also risk takers only.
Do not apply a topcoat.
Simple Nails Trailblazing french-

apply a thin coat of your favorite base coat.
Polish a multi-mani using shades off the grid, bold and boulder, risk-takers only, and also a force of nature.
With fine detail, the brush adds a complimenting french tip to each nail. also
Finish with your favorite glossy topcoat.
Checkmate-

After the base coat, with a detail brush dipped in a bikini so teeny. Apply a french tip to the pinky, index, and also thumbnails. Polish half of the middle nail and also the entire ring fingernail with bikini so teeny
With a detail brush, finely trace out the checkerboard pattern with a swoon in the lagoon.
With the same brush and also color. Fill in every other square and also finish with a glossy topcoat.
POPULAR ARTICLES-
- Homemade Strengthening Nail Growth Serum DIY
- 5 Way To Apply Color Street Nail Strips – Color Street Nails
- Color Street Valentine’s Day Nails – Color Street Nails
That’s it for today. Thank you for reading my blog. If you Love Today’s blog don’t forget to like and also share and also follow me on Instagram and Pin for new updates.
Thank You and have a great day!


