Snowflake nails are possibly the easiest and also quickest winter nail designs you can do. No nail art tool, complex masking with striping tape, or excessive drying time. The entire design is done in one go! It takes about 20 min to do on both hands, including drying time.
The holidays are almost here! And for many women, this means an excuse to shop for new outfits and also try out some unique hairstyles for those upcoming holiday parties. As you plan to look your best this holiday season, however, don’t forget about your nails! We have some fun snowflake nail art ideas that you might want to try recreating for yourself (or asking your nail artist to do for you).
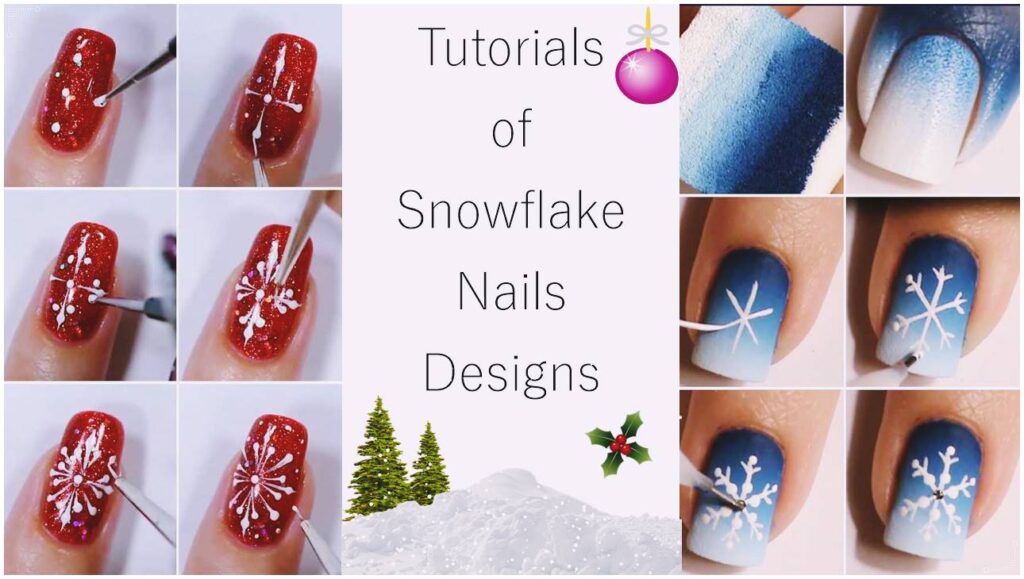
Tutorials of Snowflake Nails Designs-
Snowflake nails are the best representatives of your winter look and spirit. Plus, holidays are coming and also you should look accordingly festive. That is why we thought of nothing better than to treat you with a fresh portion of winter nail art tutorials. The thing is that there are many different techniques to pull off snowflake art. And it may be difficult to find the proper one. But we managed to gather most of them in our article. We rush to share them with you.
Red And White Snowflake nail steps-
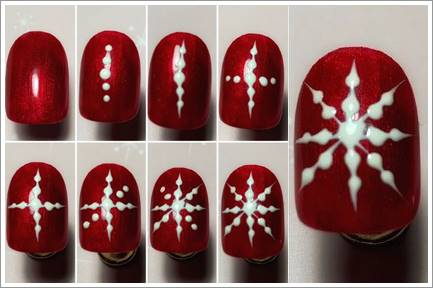
- First Apply a clear base coat.
- Apply a Red shimmery base coat.
- With the help of a thin striping brush and also white nail polish, place a dot in the middle of the nail.
- Drag the dots toward the center.
- Repeat the previous step.
- Apply a clear nail coat overtop.
SnowFlake tutorial-
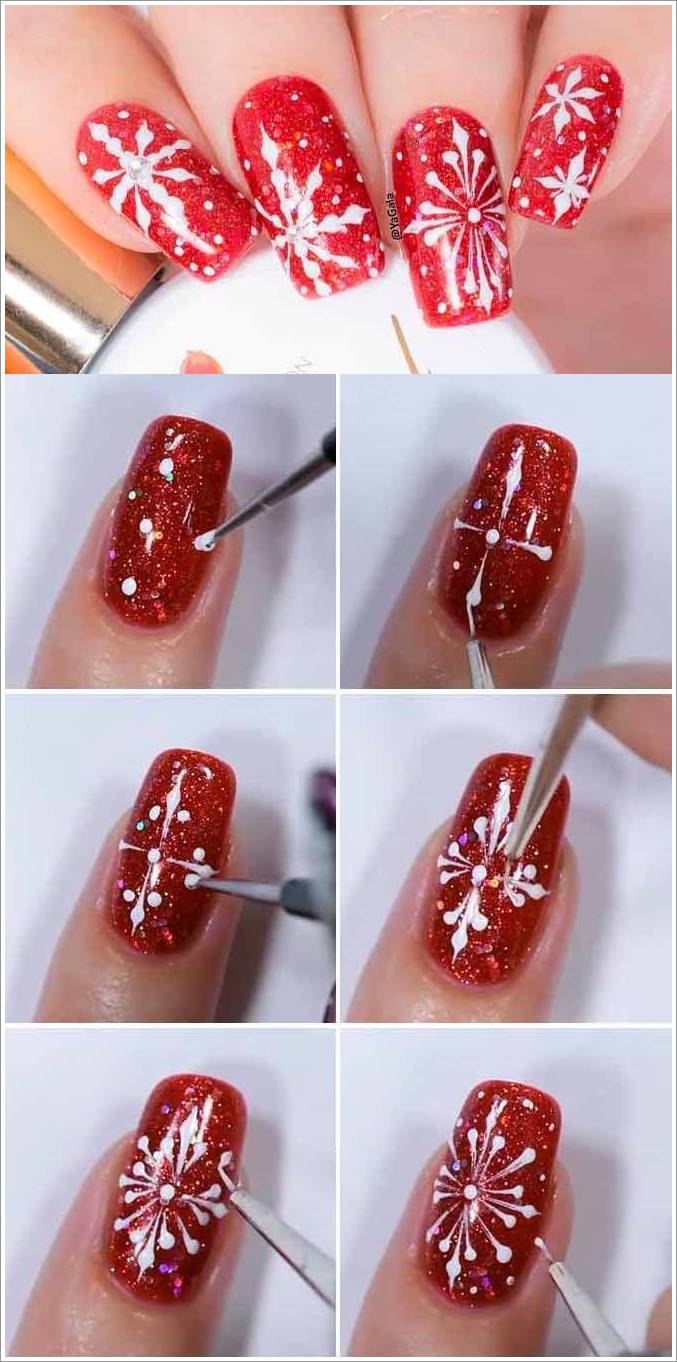
- Apply a clear base coat.
- Paint your nails with red glittery nail polish.
- Using white nail polish and a thin detailer brush, place a dot in the middle of the nail.
- With the same brush, place four dots crosswise at an equal distance from the previous dot.
- Drag the dots toward the center.
- Place more dots between the streaks closer to the center dot. Than previously and also drag them toward the center.
- Repeat the previous step.
- Apply a clear nail coat overtop.
Doable Hand-Painted Snowflakes On Your Nails
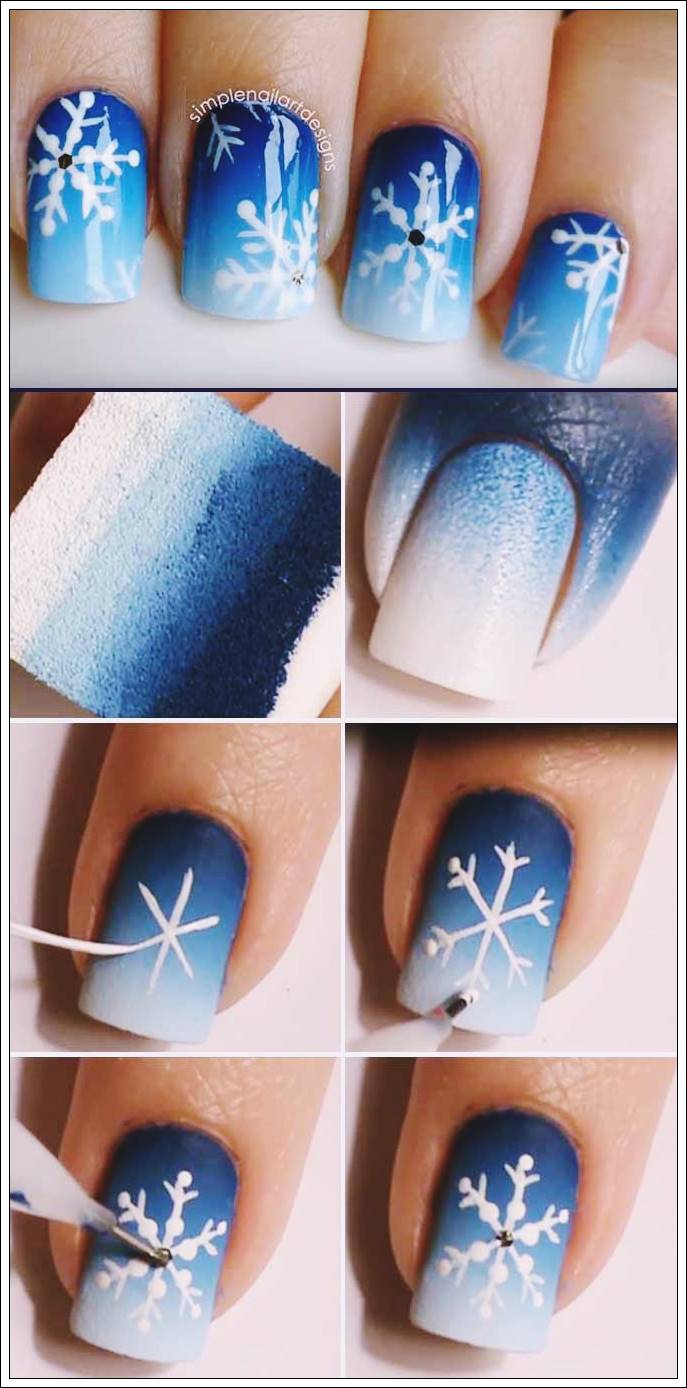
- Apply base coat.
- Apply while base coat.
- Create the gradient with three shades of blue and a sponge.
- With the help of a tiny brush and white nail polish, create a snowflake.
- With the help of a dotting tool and white nail polish, add a tiny dot to the end of every line.
- Add larger dots to the middle of your snowflake.
- Add a piece of silver glitter to the center.
- Apply top coat.
So these are three types of snowflake nail art tutorials. I hope so you like this info. If you like it don’t forget to follow me on Instagram for new updates.
- Orange Nails Design & Ideas Pictures Gallery
- Color Street Christmas Collection – Christmas Color Street Nails 2022
- 25 Xmas Nail Art Designs Ideas Pictures For Short Nails
- 15 Christmas Nails Art Designs Ideas Pictures 2022
- Coffin Christmas Nails Art Designs Idea – Christmas Nails To Try This Year
Thank you for reading my article and have a great day/night!